ConnectWise Automate Integration with Slack | Sendto Slack Plugin

SankalpIT – Plugins for Automate

End of Season Sale on Labtech Plugins | Up to 80% Off : learn more

ConnectWise Automate Integration with Slack

ConnectWise Automate Integration with Slack

Overview

Sendto Slack plugin provides you with possibilities to send alerts from Connectwise Automate to directly a Slack channel or a slack member. You may use this plugin to send a slack message to your team or directly to your clients using Automate Alert Templates.

Technically, once you enabled this plugin in your Connectwise Automate, it creates new Alert Action called Sendto Slack. You can view it in Alert Template->Add New Alert or Edit existing alert.

Buy Now!

It only costs $41/year. Want to get a branded version? Get Enrolled Now! . Want to get support: Click here.

Technical Documentation

Sendto Slack plugin requirements.

  • License key from SankalpIT
  • Sendto Slack DLL file – Download Now!
  • CW Automate 12 or higher versions.
  • Incoming webhook URL. Click here to know more.
  • Default Contact for this plugin in CW Automate.

What will change in CW Automate after Sendto Slack plugin installation?

Sendto Slack plugin installation is very straight forward process. Click here to know more about it.

Once you done with installation, you can check what has changed or added to your system by following the steps given below:

  • It creates a new tab called ‘Sendto Slack‘ on the Dashboard. You may check by navigating System-> Configuration ->Dashboard -> Config -> Integration tab. An MSP should should the Incoming Webhooks URL for Default Slack Channel for his team on this screen.
  • It also creates a new tab on the Contact Screen. There you may provide Incoming Webhook URL of any Slack channel or user to whom you want to send an alert using Alert Template.
  • Add new Alert Action in Alert Template that is called Sendto Slack.

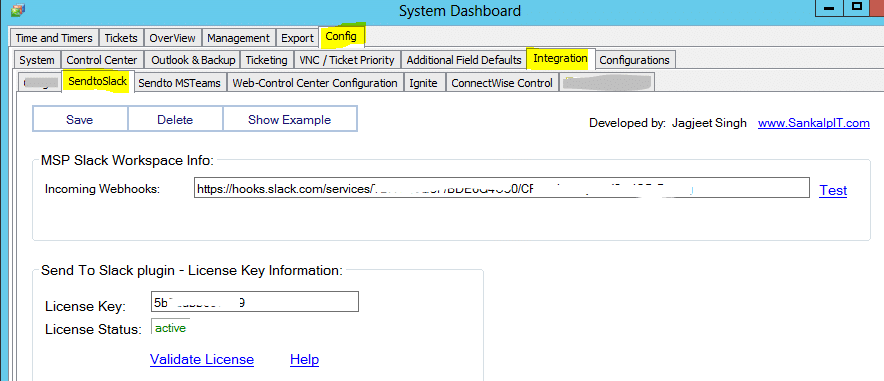
Using Sendto Slack – Activate your plugin license.

  1. Navigate to System -> Configuration ->Dashboard -> Config -> Integration -> Sendto Slack tab.
  2. Enter your license key in the License Key field.
  3. Click Validate License link. It will show as active after activation.

Using Sendto Slack in Production.

Incoming Webhooks URL of the Slack Channel of the MSP Workspace.
Provide your Incoming Webhooks URL in Dashboard.

    1. Navigate to System -> Configuration ->Dashboard -> Config -> Integration -> Sendto Slack.
    2. Enter your Incoming Webhooks URL where it labeled as Incoming Webhooks:

NOTE: If you don’t know how to get Incoming Webhooks for a Slack Channel or User.
Please study this documentation.

  1. Then click Test Link to test your Incoming Webhooks. If you get the message in the slack channel, it means everything is working perfectly.

Create Default Contact for Sendto Slack.
In this section, we will create Default Contact that will be used by plugin’s Default Alert Template in the upcoming section.
Let’s Create Default Contact for the plugin.

      1. Create a new contact.
      2. Name it Default Sendto Slack.
      3. Click on Sendto Slack tab on the contact screen.


    1. Click on Use Default URL radio button – To use Incoming Webhooks that is given on Dashboard -> Config -> Integration -> Sendto Slack tab.
    2. Click Save button. Please make sure you don’t skip any step from 3 to 5.
    3. Then click Test Link to test your Incoming webhooks. You may close the contact screen once you get the test message in the desired channel of Slack application.
    4. Still, confusion, click on this link to get help.

    NOTE: AN MSP should have one Default contact mainly for this plugin in his Connectwise Automate. For best practices use default contact “Default Sendto Slack” only to send alerts to MSP’s slack channel.

    You can send alerts directly to your customer’s Slack’ channel by providing the Incoming Webhook URL in “Use Custom URL” field.

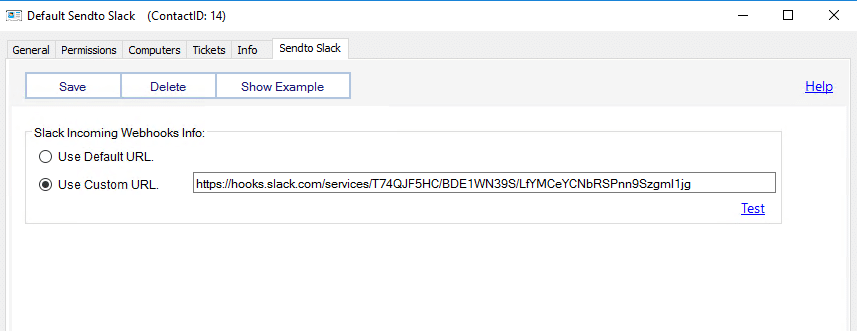
    Each time, you create any contact for “Sendto Slack” plugin, make sure to test it by clicking on “Test” link before using it in production.
    Create Default Alert Template and Add Alert Action.

    1. Navigate to System-> Configuration ->Dashboard -> Management -> Alert Templates.
    2. Click on New Template name it Default Sendto Slack.
    3. Click on Add Alerts button to add New Alert Action.
    4. It will bring a new window called Edit the Alert for Default – Sendto Slack.
    5. Click on New Alert. Again, a new window comes up called Alert Item Settings window.
    6. In the Alert Actions section, scroll down to find Sendto Slack alert action.
    7. Check the checkbox for ERROR column of Sendto Slack alert action.
    8. Select Every day.
    9. Select Contact. That is Default Sendto Slack contact. You’ve recently created it as mentioned in the above section.
    10. Click Save and Close button.

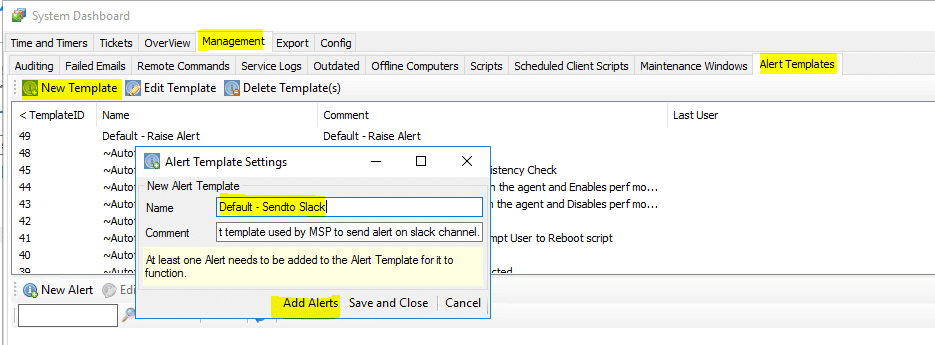
    Now, you can use this Alert Template with any monitor to send alerts on the Slack Channel.