Reboot Schedule Plugin for ConnectWise Automate
- SankalpIT
- August 6, 2020
- Documentation
- 0
SankalpIT – Plugins for Automate
The Reboot Schedule Plugin (Version 12) is used to manage the reboot schedules based on the local time zones of the machines deployed in the Automate system.
Normally, the machines used to get reboot based on the time zone of the ConnectWise/Automate Server. With the latest release, the Reboot Schedule Plugin has been updated to handle additional concerns like hiding reboot schedule tab on a group.
Click below for the download link Download Now!
Installation of the Plugin:
There is a Link Library known as .dll file. Follow the instructions below to install the .DLL file to your LabTech System.
Installation is simple and is done directly from your workstations or LT servers desktop. You only need to install the .dll one time, have all console users log out and back in to get the updated plugins once installed.
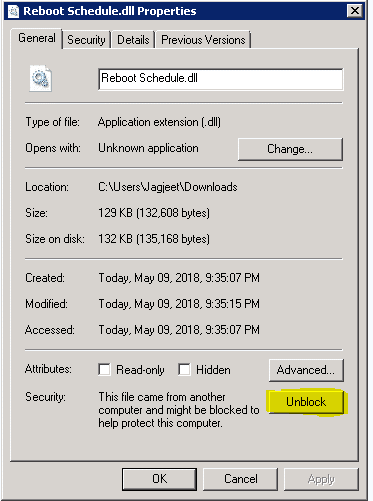
You will need to unzip the downloaded package and extract the .dll file to a location you can browse with your desktop system. You must unblock the .dll before trying to install it. To unblock right-click the .dll file and select properties. On the main properties page select the unblock button if one exists.
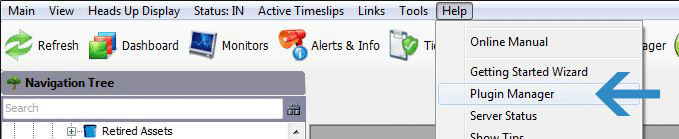
If not already open, open your LT/Automate control center and navigate up to the [Help] menu where you will find the Plugin Manager.
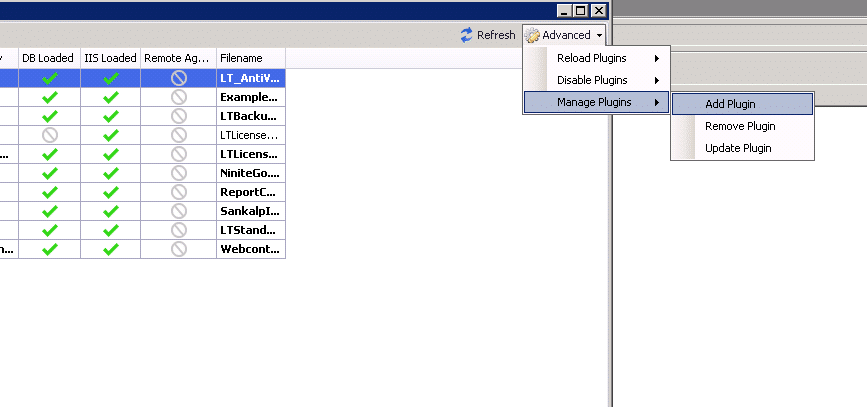
Now select the Advanced -> Manage Plugins -> Add Plugin menu and browse to the DLL file you extracted and select it.
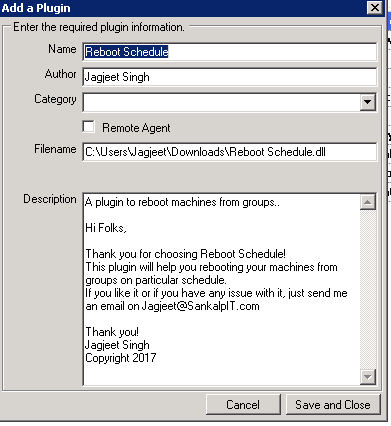
You will be presented with the plugin registration window, select Save and Close.
Now back on the main screen you will find the Reboot Schedule Plugin for ConnectWise Automate plugin in your list of available plugins but it is not yet activated. Right click on the plugin and select Enable.
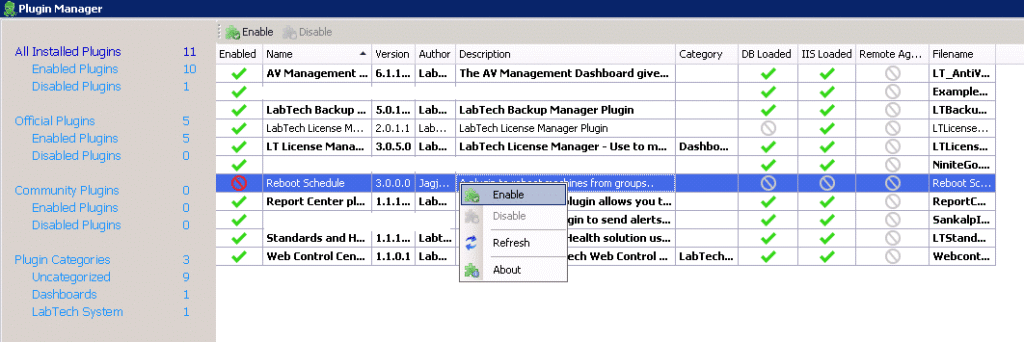
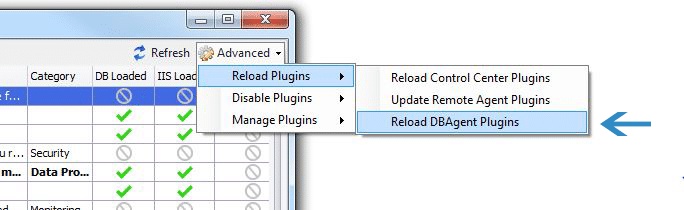
Once enabled, If it is not already restarted database service of LabTech/Automate server, we can reload the Database Agent service from plugin manager. See following screenshot.
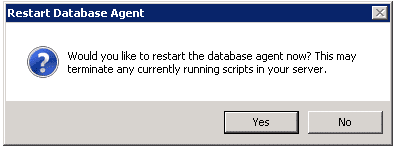
Now, a prompt will show up asking you to restart the database agent. Enter YES.
Then, the database agent will restart.
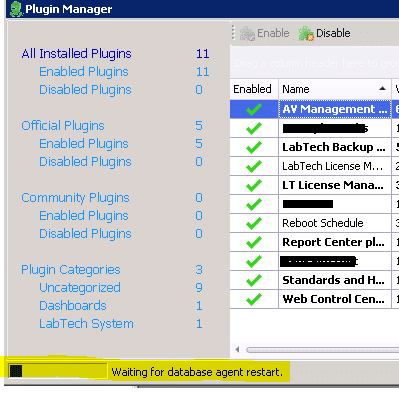
Now reload the Automate Control center, this will load the new plugin on the relaunch and you are all ready to get started.
To check if the Reboot Schedule Plugin is working fine, just verify that in the Plugin Manager->Enabled Plugins, the [DBLoaded] and [IIS Loaded] columns are green check marks.
![[DBLoaded]](https://sankalpit.com/plugins/wp-content/uploads/2020/08/Reboot_Schedue_Plugin_manager_enable_Plugin-1.png)
SELECT `TimeZone` FROM `labtech`.`computers` WHERE `ComputerID` = 1
LABTECH 10.5, 11
Dashboard->Config->Properties-> LabTechServerTimeZone.
LABTECH 12
System-> Dashboard-> Config-> Configurations-> Properties-> LabtechServerTimeZone
The timezone’s value can be inserted using following MYSQL Command:
UPDATE `labtech`.`properties` SET `Value` = 'EnterTimeZoneValueHere' WHERE `Name` = ' LabTechServerTimeZone ' ;
Example:UPDATE `labtech`.`properties` SET `Value` = '-5' WHERE `Name` = ' LabTechServerTimeZone ' ;
Setup Maintenance Mode:
There are two properties that control maintenance mode and its duration. They are called MaintenanceMode and MaintenanceModeTime respectively.
MaintenanceModeTime:- Default value is ‘30’ mins.
1. You may find these properties under:
LABTECH 10.5, 11
Dashboard->Config->Configurations->Properties->MaintenanceMode.
Dashboard->Config->Configurations->Properties->MaintenanceModeTime.
LABTECH 12
System-> Dashboard->Config->Configurations->Properties->MaintenanceMode.
System-> Dashboard->Config->Configurations->Properties->MaintenanceModeTime.
You can also update these properties’ value by using following MYSQL Commands:
UPDATE `labtech`.`properties` SET `Value` = '2' WHERE `Name` = ' MaintenanceMode ' ;UPDATE `labtech`.`properties` SET `Value` = '60' WHERE `Name` = ' MaintenanceModeTime ' ;
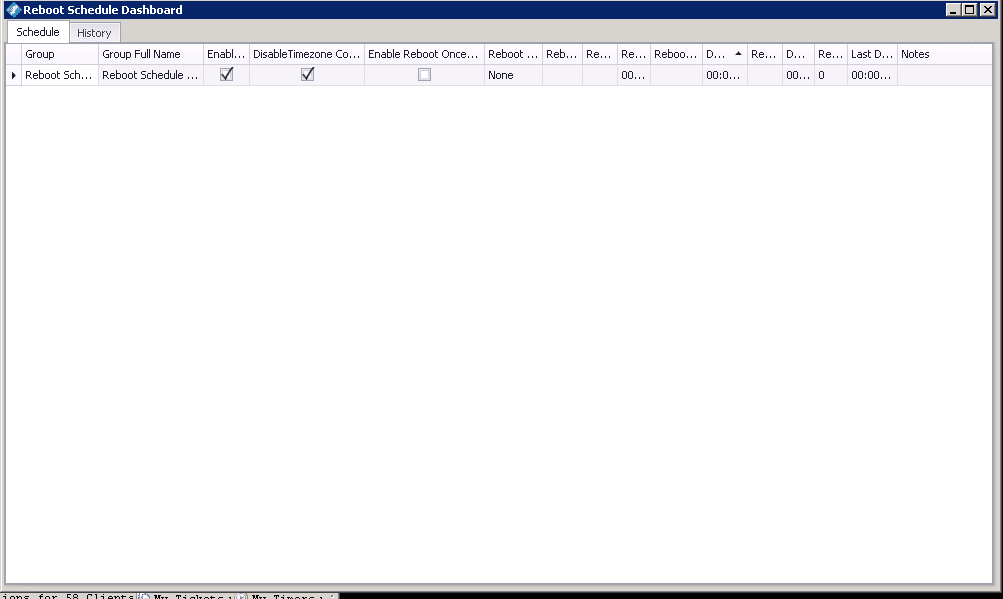
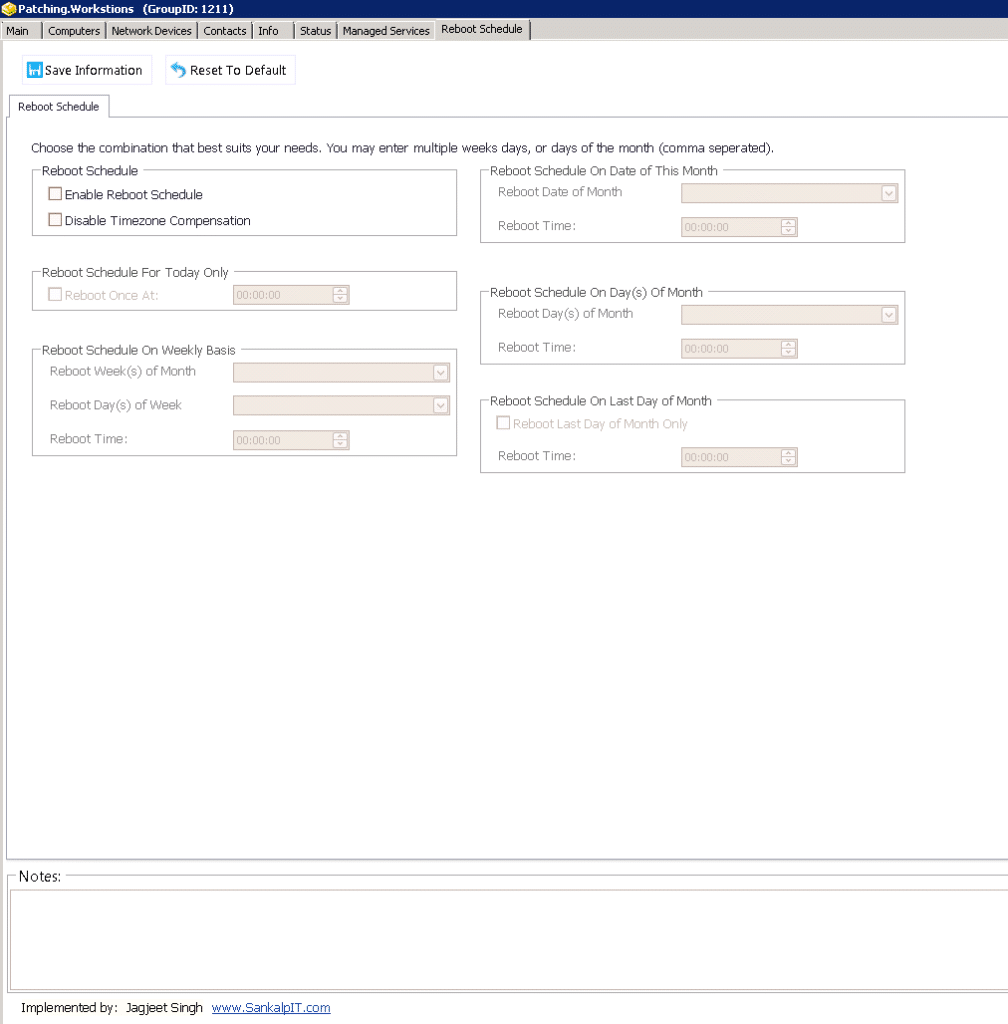
Group Screen: This is a screen where you can make a schedule to reboot the machines by your choice. You can use multiple schedules for one group. There is an option to save Notes.
1. Check the checkbox called “Enable Reboot Schedule” to make sure that you want to make a schedule.
2. Disable timezone compensation: If this checkbox is checked that means you want to reboot machines according to LabTech server’s timezone.
3. Reboot Schedule for Today Only: Go with this procedure if you would like to reboot machines in current day. Like if you would like to reboot the machine at your night time you can use this schedule. Once the specified schedule is gone, the procedure will get disabled automatically.
4. Reboot Schedule on Weekly Basis: Select this procedure if you want to reboot machines on a weekly basis. You will have to choose
Week(s) of the month,
Day(s) of the week,
And finally, time to reboot.
5. Reboot Schedule on Date of this Month: Choose this option if you would like to reboot the machines on date of each month.
6. Reboot Schedule on Day(s) of Month: Choose this procedure if you would like to reboot your machines at a specific day(s) of each month.
7. Reboot Schedule on Last day of Month: Choose this procedure if you would like to reboot your machines on the last day of each month.
LABTECH 10.5, 11
Click on View->Reboot Schedule Overview.
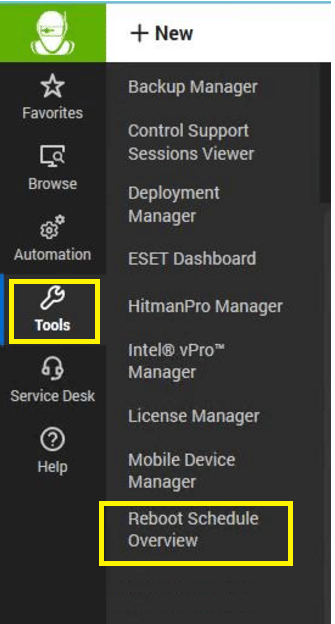
LabTech 12:
Tool-> Reboot Schedule Overview